Showing posts with label apartment. Show all posts

Wednesday, July 3, 2013

summer intentions | less of this and more of that


Confession:

Okay, so remember a month ago when I posted about wanting to cut down on clutter in the apartment? Well, I still haven't made much progress. Here come the excuses - brace yourselves! I've been either hosting guests (both family & friends) or away for each of the last 4-5 weekends. This doesn't exactly leave me with much energy during weeknights to decide whether or not I can live without my flower-y boxer shorts from high school. Spoiler alert: I can't!

Sometimes when people try to live with less, others tend to focus on what they're doing without, what they're giving up. We're not buying anymore clothes. Spending freeze. Less is more. Give it away! Purge it ALL. This man only owns 55 things. No really, he does. 


But at its core, minimalism is centered on what you gain. It's about having more. For me, the desire to get rid of some stuff and monitor what comes into my apartment comes from wanting more space, physically and mentally. I'm easily distracted - especially by shiny and/or sparkly things - and so leaving room for some empty space in my home leaves me room to think and create. To spread o u t but also to get out. Less stuff in a smaller home means less time spent cleaning/organizing and more time doing. And I don't know about you, but I'd rather be free to gallivant around on an unusually nice day instead of trying to make sense of pile of clothes ready to morph into a blob of some sort. 

In keeping with this theme, I made a list (surprise!) of what I want less of this summer and this lead to another list of what I want more of. Want to see?


Do any of you ever feel that wanting less leads you experience more? What do you want to do more of this summer? Read, swim, craft, travel? I'd love to know.

As always, thanks for reading.

xx Janelle

Thursday, May 23, 2013

goodbye gray : a painted makeover - a paintover?

One project on my list last weekend was to add some colour to the craft room/office. There is a flat-weave, beige patterned rug in there and the walls are a very light gray, aptly named Chelsea Fog. You may have seen it in my post on photo ledges. I actually really love the gray in that space. I find that having a neutral colour on the walls helps keep my mind clear to create. 

That said, a room full of neutrals can feel a bit flat - particularly if it's been overcast and drizzly for the past, oh say, ten days.

Although I wasn't quite ready to paint any of our hand-me-down, solid wood furniture just yet, I knew I could easily tackle the concrete (plaster?) planter. It was a Winners find sometime last winter for around $20. And it would give me an excuse to browse the paint chip aisle.

Here's what it looked like before:


See how it kind of blends in to the wall behind it? It looks better in this pic than it does in person.

I was contemplating either a dark teal, sunny yellow or a kelly or emerald green. After I got the nod of approval from D, guess which one I picked... Keep quiet if you saw my sneak peek yesterday ;)

Emerald. Specifically, Eleanor's Emerald by CIL.

Here is how the project went down:
  
Prepping

- I put my hot painting clothes on, grabbed a 2" angled brush, a butter knife (to pop the can) and some newspaper/cardboard.

- I laid down newspaper and then cardboard to protect the floor. The cardboard was easy to peel away from the painted surface, but a drop cloth or plastic tarp would work well too.

- I taped around the inside of the rim with painter's tape for a clean line on the inside. Since the tree is a swirly bugger and actually rests on the rim in one spot, I decided to tape him up too just to be safe. If you squint, you can see this in the bottom right photo below.


Painting

- To get even coverage, I did three thin coats of paint working my way around. In hindsight, I probably should have used primer first but since this tree will stay inside (at least for now) it'll be fine. If you plan to house yours outdoors, I would recommend priming, and also using a sealant afterwards. Gotta protect it from the elements.

- I peeled off the tape after painting & slid the planter back in its place.

PS: I listened to Design*Sponge answer FAQs about their blog while I painted. Grace & Amy were so lively to listen to - a welcomed distraction!

After

I have to admit when I decided on green I was a bit nervous about it being too much green with the leaves and all, but I intentionally chose a green that was more blue since I knew the plant had yellow undertones. This gives it a bit more contrast than if the planter was a lime-y colour.

Here's how it turned out:


I'm so happy with it. Every time I walk into the room my eye goes right to that corner. Thankfully, it helps distract from the fact that there is a Star Wars poster hanging above it. I know how to pick my battles when it comes to decorating...

It's surprising how painting an accessory can have a big impact. And now that it's done - I've been thinking about what else I could do to tie the room together. Next on the docket:


- Hang curtain rod & panel on the window
- Fix the lack of closet door situation
- Re-organize bookshelf
- Get diploma from home & hang it up


Are you an emerald fan? 

If you did any decor projects recently, feel free to link up in the comments, I'd love to see!

xx Janelle

Wednesday, May 22, 2013

small apartment : show me the green


I painted something this past weekend. And wouldn't you know it's in Pantone's Color of the Year for 2013 --- Emerald.

I'll spill the details soon. My brain is just feeling a bit foggy from so much computer time at work and in the evenings. Time to switch off for the night.

Any guesses on what has been given a new life with this splashy green?

See you soon (I promise!),
xx Janelle

Monday, April 1, 2013

brighten up a small apartment bathroom with $10

Apartments have the weirdest bathrooms. Especially, old houses converted into flats. Although our last apartment was in a tower, it still had it's fair share of design flaws. There was a grate in the ceiling (apparently for venting) but the bathroom had no fan or window and therefore, no airflow. As you can imagine, we had major mould issues. After a particularly hot shower, the condensation would actually drip down the walls leaving little slug lines. It was gross.

Guys, our new apartment has a fan. It's so luxurious! Oddly enough, it also has a window in the shower and a half-wall made of those see-through blocks, which I think are from the eighties. Do you know what ones I mean? The door is a sliding barn door, which I admit would be pretty cool, if it didn't leave a four inch gap on one side and had a working lock.

There's a point to all this, I promise! Keep reading...


The fact that I'm pointing out all of my bathroom quirks might make you think I don't like it, but I do! I really do. Despite the fact that it's tiny, there is a ton of storage and it has the perfect little nook for our plastic storage drawers which hold towels and toiletries and ten thousand bottles of shampoo. A wall-mounted sink also means no countertop clutter, since everything is hidden away in the mirrored cabinet. If I'm given a counter, I will clutter it, so this is a blessing. Thank you, apartment bathroom gods. 

Onto the upgrade! All you have to do for this one is shop. Zero handiwork and/or tools needed. 


Along with all of their weird features, apartment bathrooms can be a little blah. Our current beige bathroom desperately needed a little colour, so I bought a purple orchid, put it in a handmade clay dish and set it on the toilet tank. It's amazing how much of a difference it made. The blooms really pop against the white fixtures and shower curtain. This one was only ten bucks (!!) at Superstore, but I know they have them at Sobeys too.


I swear these flowers were made for people who can't keep a plant alive. I have somehow managed to kill every plant or flower given to me, so I can say this with certainty! This pretty lady is still kicking one month later. Not only is it still alive, but it's actually thriving. New blooms just keep popping up. I've also taken to excitedly announcing each new bloom to D. He's somewhat less enthusiastic about it than I am.


How to NOT kill a mini orchid: Stick it by a sunny window. Water it once a week with a tablespoon of cold water.

Never though I'd be dishing out plant advice, but here I am. One mini purple orchid makes a dingy apartment bathroom seem a bit brighter!  


Spring is here!
xx Janelle


PS - I'm sorry this post has my toilet in it. Just focus on the flower!
PPS - I have a long-awaited series of green cleaning posts coming up very soon. Made specially for lazygirls, like me!

Tuesday, February 26, 2013

wall art for cheap : photo shelves


Art doesn't have to be fancy or expensive to have an impact. It took me 6 months to realize this.

I had been waiting months to hang up an art print I bought shortly after moving into this apartment last August. We don't have a Target up here in Halifax and Wal-Mart has the worst selection of modern frames. I wanted a thin, white wood frame with a mat. I couldn't find one, so I tacked it to the wall, still in it's plastic sleeve. It looked a bit sad.

Sometime last fall I was browsing the dollar store and spotted these shallow white ledges. I think they're called postcard ledges or photo shelves or something like that. Anyway, a few years ago I lusted over similar DIY shelves on YoungHouseLove and thought the art print might look nice perched on one. As I stood in the aisle, trying to think of a reason to buy a few more, I remembered some treasured travel photos I had fished out of my parents' old photo boxes. The shelves were only $2 each so I got three and practically skipped home to show D my finds.

After months of stalling contemplating the perfect spot, I finally decided on the space above my craft table - which you finally get to see! I was originally going to hang all three of them in evenly spaced parallel lines, but then I saw Rachel Howe's home tour on DesignSponge.

Photo by Chris Fantauzzi for DesignSponge

And just like that, I was sold on an asymmetrical arrangement. I leveled the shelves and hung them using the provided tacks. No nails needed! I lined these two shelves with a few photos, one tiny art print and a postcard that says Be, which was a sweet gift from a close friend (hi, Lo!).


Here is a closeup of the hand-lettered piece you see tacked up with washi tape. I made it a little while ago. Sometimes I can spend all day planning or dreaming up creative projects. This reminds me to actually make stuff, to create something. The photo on the right was taken by my parents. My wanderlust always comes bubbling to the surface when I look at it. Here's hoping I will be able to travel soon.


The stuff you see hanging on the left a few photos above is a mish mash of family photos, an ink & acrylic piece that says "create freely", a dotted wave greeting card and a sketch I did of D one night. Here's a better look.


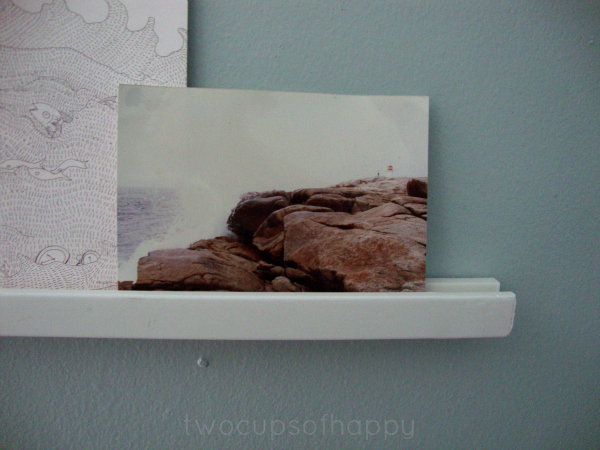
The last shelf found a home on my side of the bed with two coastal inspired pieces. The print is by Sarah Burwash and was found at the ever-inspiring local boutique, Inkwell. The photo is of Peggy's Cove, Nova Scotia with it's iconic lighthouse playing "Where's Waldo" in the background.


That pic shows how shallow the shelves actually are. A really thin frame might fit.


These are usually the first things I see in the morning, which makes me so happy. I dream of waking up in a lakehouse someday, but until then I'll enjoy my makeshift water view, however small it is.

So there's my little weekend apartment beautification project. $6 shelves + homemade art, photos & prints = wall art for people with student loans. Can I get an amen? If you're in Canada and want to find the shelves, hit up the Dollorama. I'm sure you can find them in other stores too or you can make your own if you have a few basic tools like YHL did in the link above.

Okay, so I'm sure I can't be the only one who takes forever to slap some art on my walls. When you move to a new place, do you hang everything right away or stall until you can find the perfect art, frame or arrangement?

xx Janelle 

Friday, November 30, 2012

decking those halls, baby : sneak peek of my Christmas color scheme!


I have a rule that I cannot listen to seasonal songs until Dec. 1st. The idea stemmed from the thought I had that I will have to listen to Christmas tunes for the rest of my life - the same 30-ish songs, by various artists, year after year, for the rest of my (hopefully!) long life. If you're thinking I don't have to listen to those songs, you would technically be right, however, I do some shopping around this time of year in malls & local shops; places where most managers that seem to think that November is the perfect time to start playing said songs. Okay, so I guess my rule should read: I will not play Christmas music until Dec 1st.

All this to say that tonight, I'm breaking my own scrooge-y tradition.... by one day. Tonight I will twist D's arm into helping me decorate our little apartment with garland, stars and general Christmas cheer.You know I'm going to blast Boney M's famous album while sipping hot tea and dancing around the room. It's going to happen. We are going to be decking these halls alllll night. That doesn't sound right. How about this:

Warm sweaters, hot drinks, cuddles and a dog licking glitter off the floor. 

Here are a few of my inspiration pics from Pinterest:

Flickr via Ticklish From A Distance
From The Right Bank via Apartment Therapy
via Canadian House & Home
via Matchbook Mag blog

Did you decorate your place yet? Leave your links in the comments, I love some holiday eye candy.

Thursday, October 18, 2012

Baking in a Rental Without Counter Space: Banana Crumble Muffins

For the first month or so of living in our new place (pics soon!) I avoided baking. You see, our apartment's sink is flanked by two laminate counter tops wide enough for one baking sheet on each. Yes, I measure things in baking sheet units. As you can imagine, those counter tops are not clear because we've got the toaster on one side coupled with a few dirty dishes and on the other side we have our knife block and dish rack. Counter space = gone.

I should tell you that this has not stopped me from cooking though, I mean, a girl's gotta eat. I make due with a large wooden cutting board placed over the two burners that aren't in use. it makes for a pretty great prep space, it's cozy and I like it.
When the oven's on (ie. when I'm baking) the cutting board is banished from the stove for obvious reasons.

Our solution to the lack of counterspace was to use a 3-tiered wooden shelf given to us by my grandparents. They found it in the garbage room of their condo, still wrapped in the plastic! It's one of those ones that needs to be drilled together and has the slatted shelves.

For my baking set-up yesterday, I brought the cutting board over to the window and popped it on top of the wooden shelf. I blocked off the entrance to the kitchen with garbage bins to stop our nosy pup from getting in the way/mooching and pushed the microwave into the centre of the room so I could plug it in elsewhere since we blew a fuse last week. I pulled my large bin of baking stuff onto the floor along with the canisters of flour and sugar. I hope you're getting the full visual effect of how ridiculous this whole set-up was. Apron on, flour everywhere, my computer perched on the wooden shelf with two mixing bowls, the oven beeping at me. A pretty, pretty sight. Or a hot mess.

Mess aside, I had fun time baking in my little kitchen. I could hear D's reactions to the Raptors' game he was watching in living room and I could see our little nosy dog peeking her head in, hoping to eye some crumbs for later.

Want to see the Banana Crumble Muffins? Feast your eyes on these babies.

I used this recipe from Amy Allen Clark at MomAdvice. My only change was that I doubled the cinnamon for the topping. This is a great recipe for using up bananas that are starting to turn brown. I usually go to my mom's recipe for banana bread, but decided to change things up a bit. I like the portability of a muffin for work and they are easier to share, too. My two co-workers gave them a thumbs up this morning!

I think I'm going to start adding some form of crumble to all of my future muffins. Blueberry crumble, apple crumble, raspberry crumble... It gives the muffin a bit more texture, richer taste and a dressier look - great for when you're trying to impress the in-laws. Haha. Beware of the crumble though! It's kind of like glitter in that it tends to get everywhere when removing the muffins and setting them on the cooling rack. I have my pup for crumbs, but you might need a damp cloth.

What are your go-to recipes for bananas past their prime? If you make any crumble muffins, let me know. I'd love to see them!


Monday, May 16, 2011

Casa (Monday): Upgrade!

I have some exciting news to share. Well, let me rephrase that. It's exciting for me because I was fed-up with our old couch. For the first few months it did the trick and to be honest, I didn't even really notice how uncomfortable it was, but lately it's been driving me nuts. Let me just say that it was very generous of D's parents' neighbour to give it to us. If she hadn't our living room would still look like this:

Bachelor pad?
Now I don't have a pic of our old couch in it's entirety, but you can see the top of it here


and the bottom of it here

Needless to say with the brown velour and vibrant 70s flower pattern it just wasn't our style. So we found this beauty on kijiji. After a "nail-biting" coin toss at the sellers house, my cousin and grandfather helped us bring it home. 

There it is! Our 200$, 8-year old, Ikea, Abby-friendly couch. It's comfy, it's easy to vacuum and when I wear gray sweatpants I blend right in. What more could we ask for, really?

xo Janelle