Showing posts with label recipe. Show all posts

Wednesday, March 7, 2012

garlic fingers with fake fromage

**There is milk in naan. You could always sub a milk-free flatbread or pizza crust instead.

I suck at not eating lactose. Not drinking lactose is easy. There are so many milk-alternatives available for roughly the same price as milk. They even make lactose-free milk. Same taste, but none of the bad stuff. So not drinking milk is definitely doable. But cheese, now that's a different story.

I tried a cheese alternative once and just could not swallow it. It smelled bad, had a weird texture and was Italian flavor. Blehhh. So I just kept eating cheese and experiencing very unpleasant side-effects, none of which need to mentioned on this little blog here.

My highly-allergy plagued friend L told me about Daiya when we were discussing our various stomach issues over lunch one day at the Wooden Monkey. Don't we sound like a good time?

It's basically a tapioca-arrowroot product that melts like cheese and does not taste disgusting, it actually tastes good. It doesn't have a true cheesy flavour or texture per se, but I have found it to be a great substitute! It only comes shredded, but that hasn't stopped me from eating it by the handful at times... I use it on nachos, burritos, pizza, chili, lasagna and all of those other things that taste incomplete without cheese. I've bought both the mozzarella & cheddar style before and they both work well. I used to buy it from Pete's Frootique but they now carry it at Sobey's, where we do groceries every week, for $3 cheaper!

Lately, my big indulgence has been garlic fingers. I take a piece of naan bread, spread it with garlic butter, sprinkle real bacon bits on top, cover with Daiya & bake at 400F for about 10 minutes. The best non-cheesy garlic finger you'll ever taste. So all this to say, if you are lactose-intolerant or allergic to milk... you need to try Daiya. It will help you resist actual cheese. Most of the time...
Do any of you have allergies/intolerances? Do you find that having a good substitute helps you resist temptation? I think substitution is key, even for people who are dieting. Quitting cold turkey, just does not work for some people. Myself included!

  
FYI: I am lactose intolerant but will eat some packaged foods with milk in them, like bread or chocolate (sometimes). Anything milk-based though is out of the question. No milk, yogurt, ice-cream, alfredo sauce etc.  

Me & cheese are fighting it out. I can't quit.

Tuesday, February 28, 2012

cranberry apple crisp


This was our snack on Sunday. I had to seriously restrain myself from eating the whole pot full. Apple crisp was my favorite dessert growing up, tied with cheesecake. I remember mom used to make this at least once a month. Since we had a bag of apples that were a little past their prime, I decided to attempt making my own recipe.

In all honesty, I tried making apple crisp about 3 years ago and ended giving it entirely to my roommate. The "crisp" on the top was chewy and not at all cooked. It tasted okay, but the texture was gross. This time, I was determined to do it right. I was petty sure the reason it didn't turn out the previous time, was because I didn't add enough butter. So, I added lots of it this time, but I used margarine instead. The verdict? Amazing. Melt in your mouth apples with crunchy cinnamon-y topping topped with a scoopful of heaven (aka.light Cool Whip). Must. Not. Eat. Whole. Pan.

Cranberry Apple Crisp
Preheat oven to 375F.

5-6 apples
squirt of lemon juice
handful of Craisins
1/8c apple cider (unpasteurized)

Squirt a bit of lemon juice in a medium bowl. Core & slice the apples and toss with the lemon juice to reduce browning. When finished, lightly pack apple slices into a corningware dish (I used a round white one). Add a handful of Craisins. Pour cider over apples.


1-1/2c large flake oats
1/4+ c margarine
1/4c brown sugar

Mix these ingredients in a bowl until crumbly. Mixture should look something like this:


cinnamon, nutmeg & cloves

Spoon crumbly oats over apples and press down lightly. Sprinkle with a generous amount of cinnamon and a sparing amount of nutmeg & cloves. Bake at 375F for 40 mins. Top with a big spoonful of Cool Whip or ice-cream. Serve warm.

*If there's too much water/cider in the bottom, just drain it a bit! Maybe next time I'll try soaking the apples in the cider and then draining before putting them in the pan. If I do, I'll post an update.


Indulge!

Saturday, February 25, 2012

lunch quickie: bacon avocado fresh spring rolls

My workday lunches can get pretty boring. They're usually delicious, but ordinary. I think I once ate tuna, crackers and raw vegetables every day for a week. And there's always the fallback sandwich or wrap.

Since I'm lucky enough to get to come home for lunch for a full hour, I usually just make something when I arrive as opposed to having something prepared. It has to be something easy & relatively fast so that I can join D on the couch for the Price is Right on TV. Yes, we sometimes act like we're in our seventies. Watching PIR, playing scrabble, doing other old people things...

Last week I had an avocado that needed to be eaten up so I thought up with these delicious Bacon Avocado Fresh Spring Rolls. They don't take too long to make, about 10-15 minutes for 4 and are a great alternative to a sandwich.


You will need:

rice paper wraps - tomato - bell pepper - avocado - real bacon bits - deli shaved ham - ranch dressing or honey mustard

You will need to:

Cut the tomato, avocado & bell pepper into slices.

Fill a bowl with 1" deep hot tap water. Carefully place one rice paper wrap in the hot water. Let soak for about 20 sec and then flip and soak for another 20 sec. Keep soaking and flipping until the wrap is soft enough that you could fold it in half.

Shake off excess water and lay it flat on a plate. Top with 1/2 or full slice of ham, tomato, pepper and avocado. Sprinkle with bacon bits and add one thin line of sauce.

i ran out of avocado on the 2nd day. please use your imagination!
Start rolling the spring roll at one end, tucking the sides in as you go. Then place the spring roll seam side down on another plate and repeat for the rest of the rolls.

If you need help wrapping/rolling, check out this video from Expert Village.


Yum. These are fresh, healthy and surprisingly filling. They taste great with the honey mustard or the ranch, depending on what flavour you're feeling. Don't omit the avocado, like I did here, they're much better with the avocado's cool, refreshing taste.

Now I'm dreaming of summer so I can eat these on the patio with a lemonade in hand. Soon enough...


Friday, February 24, 2012

veggie-packed fuselli casserole

*My computer had to go back to the Dr. which is why I've been MIA this week. It's all good now though & my webcam is functioning!

I almost titled this post macaroni casserole, because it's pretty much just a vegetarian version of the one my mom used to throw together with ground beef... but I used fuselli instead, so there's that.


I'm going to do a whole post on Daiya soon!
Veggie-packed Fuselli Casserole
*Serves 6-8


2/3 bag of fuselli
2 large bottles of pasta sauce
2 handfuls of baby spinach
1/2c frozen corn
almost 1 sleeve of unsalted soda crackers
lots of grated cheese
spices


- Preheat oven to 400-425F.

- Boil water in a large pot. Add pasta and stir, continue to boil on reduced heat. When pasta is almost cooked (7-8mins) add frozen corn. Cook until desired tenderness & drain.

- Put pasta/corn in a large bowl, add spinach, pasta sauce and stir until pasta is coated. Pour into 13x9 pan and flatten lightly.

- Crush crackers over pasta to cover and grate a generous amount of cheese over top.

- Bake for 25 mins, then let cool slightly. Done!


This meal never fails to remind me of home. My mom's comfort food is the best. Doesn't everyone say that about their moms though?

Love,

Monday, February 20, 2012

eat your heart out, new york fries.

We've officially declared this week: the week of amazing suppers. C (the roomie's gf) is staying with us for their Spring Break and for the past two nights the four of us have had supper together. With Abby under the table, as usual. So for the rest of this week I'm going to attempt a food post every night. I promise you delicious looking photos & somewhat original recipes. Sound good?

Tonight we had oven-baked fries with the works. All day I had been craving a big veggie nacho poutine from Smoke's poutinerie. It's basically nacho toppings on fries. Think peppers, tomatoes, cheese, sour cream etc. Like New York Fries Veggie Works. Knowing how bad they are for me and thinking of the havoc they would reek on my sensitive [not to mention lactose-intolerant] stomach, I decided to recreate my own version at home. I hope you ate supper already, because this might make you hungry.


For the fries:

Wash up your potatoes well. Slice them lengthwise once and then lay both halves flat. Cut fries into ~1cm slices. Put them immediately into a bowl of the very hot tap water. (I got this tip from a forum online. I guess it draws out the starch and helps make them crispier. Trust.)

Preheat oven to 425f. Once the potatoes have soaked and then oven is hot, dry them off with paper towel.

Spread a baking sheet with olive oil, about 4T. Spread it around with your hand or a pastry brush & sprinkle the sheet generously with salt.

Lay the fries on the pan so they are not touching.

Bake for about 30 minutes, turning every 8-10 minutes. The more you turn them, the less likely it is they will stick. If you have parchment paper, all the better! When they're almost cooked, sprinkle them with chili powder or your favorite spice.


Drain on paper towel and serve piping hot.

Load them up:


Here's whats on mine:

chili, guacamole, Tofutti sour cream, red onion, green onion, bell peppers, tomato, Daiya imitation cheese.


Technically "healthier", not deep-fried and all five food groups. Good enough for me!

Did you ever try to make a healthier version of a fast-food or restaurant favorite?

Sunday, December 18, 2011

gooey marshmallow puffs of heaven


Seriously. I'm so glad there were 3 other people in the house, otherwise I would have eaten all six of these Magic Marshmallow Crescent Puffs without a second thought.

These take about 5 minutes to whip up & 12 minutes to bake. And because you can get crescent rolls on sale for $1.99 (& you probably already have the other ingredients) they're cheap too!

When I made mine, I didn't put the glaze on them and I didn't measure. I just melted some margarine the microwave & mixed some cinnamon + icing sugar on a plate. I dipped the marshmallows and then used a fork to roll them around in the sugar mix. Then I wrapped them up tightly in the crescent rolls, sealing well. Instead of dipping the whole thing in butter as the recipe suggests, I just brushed some margarine on top. I also baked mine on a baking sheet instead of in a muffin tin for easier clean up. They made a mess on the pan, but because my pans were brand new (Thanks, B!) the stickiness wiped right off!

Such an easy holiday party treat. Don't you think?

Wednesday, November 2, 2011

Tasty "Tuesdays": Mom's Meatballs

Sorry this post is going to be a quickie. It's late and I have work in the morning! It's really not a recipe, so you won't see precise measurements... just trust me though. They're hard to screw up. Unless you burn them, so don't wander too far. No one likes a grease fire...

These taste just like the ones mom used to make for us. The soda crackers & the eggs make them so juicy. Perfect for spaghetti & meatballs.


Mom's Meatballs
Serves 4

- lean ground beef (small-med pack)
- 1 egg
- 6-8 soda crackers
- spices of your choice

Preheat oven to 400. 
Mix all ingredients with your hands in a large bowl.
Roll into bite-sized balls.
Place on a cookie sheet & bake for 20 minutes, turning once.  
Blot with a paper towel & enjoy!


yummmm.

That's it! Mix, ball, bake, eat.

Tomorrow's dinner? All done. You're welcome. ;)


Tuesday, October 11, 2011

Tasty Tuesdays: Cinnamon Poached Pears

I think I accidentally stumbled upon my favorite fall dessert recipe.

Honestly, I was never much of a pumpkin pie eater...

I based my poached pears off of this recipe. Her's are prettier, mine are healthier. Not that I was trying to make them healthy. I actually just ran out of time. I was going to wrap Pillsbury crescent roll dough around them and bake them up. Instead I stopped here:


And am I ever glad I did. They were amazing. FYI: I am not tooting my own horn here. I am not the first girl to poach a pear. And considering I can't even poach an egg.... they are simple to make. Take my word for it.

Or, you know, you could always.... make your own.

clearly a messy cook.


Cinnamon Poached Pears
modified from Sprinkle Bakes

3-5 pears (I used red)
3-4 c water
scant  1 c brown sugar
cinnamon
whole or ground cloves*
nutmeg*
2 tsp vanilla extract
crushed nuts (walnuts or pecans work well)
caramel sauce (optional)
ice-cream (optional)

Fill a pot up with 3 or 4 coups of water. Add sugar, spices and vanilla and stir well. Bring to a boil.

While waiting for water mixture to boil, peel & core pears. Add to boiling mixture. Let boil uncovered for about 20-30 minutes. Once pears are very tender, turn off burner and let pears sit in water uncovered for about 10 minutes.


Spoon pears into bowls and top with a bit of poaching liquid, caramel sauce and some crushed nuts. Top with a scoop of ice cream, if you like. Cuddle up by the fire & serve immediately.

** A note about the spices: I always eye ball my spices and add more or less to my own taste. Don't be afraid to load on the cinnamon but try to go easy on the cloves and nutmeg. A little goes a long way with those two. I learned that lesson by ruining an entire batch of pancakes with nutmeg.... Haha. **

I hope you enjoyed my little fall recipe. The sweet smell of cinnamon and vanilla wafting through the house will bring you warmth when the weather gets cold again. You may want to tuck this recipe away for safe keeping.


Tuesday, October 4, 2011

Tasty Tuesday: Tonight's Supper

Because I snacked on chocolate all afternoon at work. (Oops.) I've decided just to snack for supper. Since I had a round loaf of bread I needed to use up I made an
artichoke bread bowl dip
.


Here's what's inside:

sour cream
mayo
herb & garlic cream cheese
(all light)
1/2 can artichokes, drained/rinsed
herb & garlic dip mix
basil
grated cheddar cheese
topped with chili powder

I heated up the bowl in the oven for 5 minutes first while I warmed the dip in the microwave. Put the 2 together and done.

This is quite possibly the easiest thing to make for a potluck or when hosting a dinner. I like that it's very customizable too. Don't have artichokes? Throw in some spinach. Want a little crunch? Cut up some celery. If you don't like garlic, you could always throw in some other spices instead.

Have you ever made a bowl dip? How about a soup bowl? Tell me!

Also, FYI: I tried octopus this weekend! Eep. It was so nice of my Japanese friend to cook for us, so I simply had to try it. Luckily it was made as part of a floury dough and we added lots of yummy sauce, so I could barely taste it. It was just the texture... chewy and squeaky. Yeah...

Tuesday, September 27, 2011

Tasty Tuesdays: Black Bean Soup

Remember on Friday when I told you I made soup? Well I got the recipe for Black Bean Soup from Jen @ jenloveskev. Click for recipe. It turned out pretty good and it definitely hit the spot with some naan on a cool day. We brought some down to D's sister and she seemed to like it too! The recipe measurements are a little wonky (ml/oz etc.) but you really can't mess it up. I just used an online converter.

I made a few substitutions. I added one can of black beans and one large can of chickpeas instead of 3 small cans of black beans. I also added about a tsp more chili powder, a bit more cumin and a dash of garam masala. Yum.

Since I was too busy rushing to get everything in the pot, I only took a few pics. For the best pic of the soup, go to the jenloveskev link above! I know the one below doesn't look that appetizing... woops.

sunny yellow pot!

ingredients

after adding spices
Try this soup if you want something different that's not too outlandish. You'll like it. I promise... :)

Thanks for visiting,

xo Janelle


Wednesday, August 24, 2011

Today's Lunch: Bruschetta Chicken Sandwiches

Well, we made it half-way through the week. Thank you! I feel like it's hard for me to stay motivated at work this week. Hopefully things will pick up tomorrow. At least my lunch hour was pretty good, mostly because I inhaled two of these babies:


Bruschetta Chicken Sandwiches Serves 2

1 or 1-1/2 tomatoes, diced, drained as much as possible
1/4 green pepper, diced

5-6 slices of deli chicken
2 whole wheat buns or rolls
1-2 tsp
cilantro
1/4-1/2 tsp basil
1 clove garlic, minced
2tbsp balsamic vinegar
1 tbsp olive oil (optional)

Mix all ingredients in a bowl. Toast a bun and spread with garlic butter. Top with one or two pieces of deli-slices chicken breast. I used Natural Selections by Maple Leaf. Eat up.


Another option is to throw it on a wrap & add some feta:


I love bruschetta. So much so that I try to order it as an appetizer at almost any restaurant I visit. My absolute favorite version, which no one has been able to top, is at Jack Astors. They top theirs with this garlic aoli (fancy mayo stuff) and balsamic reduction that takes it over the top. I strongly recommend that you try it the next time you're there. You will not be disappointed!
The Scrap Mongrel
Love & tomatoes,
 Janelle

Tuesday, July 26, 2011

Tasty Tuesdays: How have you bean?

Hi everyone,

Today I've got an original (aka. thrown-together) recipe for 3-bean salad with feta. It can easily be ready in 10 minutes and it goes really well with fish, chicken or rice. Because of the cumin & coriander it's different than most bean salads which rely on vinegar. This one has no vinegar but gets it's flavour from the feta and spices. Check it out:

3-Bean Salad with Feta
*Serves 3-4

1/2 c. edamame
1/2 c. green beans
1/2 cup chick peas, drained
1/4 c. raisins
1/8 c. crumbled feta cheese
1/8 tsp cinnamon
1/4 tsp cumin
2 tsp olive oil
a couple shakes of ground coriander
pinch salt

Put your raisins in a small bowl and cover with hot tap water. Cook up your frozen edamame & green beans in the microwave. I put mine in a covered, microwave dish and nuke them for about 2-3 minutes. Drain them, put them back in the dish & add the chick peas.

Add the olive oil, spices + salt. Crumble the feta on top & mix well. Drain the raisins and throw them in. Stir it up and bam. You're done.

------------

I added some extra cumin to mine, but I think I may love it more than the average person so feel free to experiment a bit! And trust me, don't skip out on soaking your raisins. It makes such a difference because they plump right up.

xo Janelle

PS- I ate it too fast to get any pictures... but I think you can figure it out!

Tuesday, July 12, 2011

Tasty Tuesdays: Slow-Cooker Pulled Pork

Good morning! Hope your morning is off to a good start. I didn't have a good sleep, but I'm in bed eating some of my favorite oatmeal so I'm pretty happy at the moment. If you read yesterday's post then you know we made pulled pork for supper on Saturday. We were having my Nan, Grandad, Auntie Judy and cousins Hannah & Philip over. I made a double batch (Hello leftovers!) but the recipe that follows is a single one.

Now if you read this blog at all, you know that I love simple recipes and this one is just that. You pop the pork in the slow cooker and go about your day for the next 8 hours or so. Then it takes about another 15 minutes of work to get it all ready. For this reason, it's great to make when you're having guests because no one likes to spend the whole time in the kitchen and miss out on the fun, right? Anyway, here is the "recipe":

Slow-Cooker Pulled Pork

Serves at least 4

1/2 large onion, diced
1 pork roast, shoulder or butt
1-3 c. apple juice
1 bottle of BBQ sauce
1 bag of coleslaw (or cabbage very thinly sliced)
coleslaw salad dressing
4+ buns, Kaisers are good
salt & pepper


1. Put your onions in the bottom of the cooker and trim the fat off of your roast.


2. Put your roast in the cooker, pour the apple juice over the top and season the roast with salt & pepper. The apple juice should be about 1/3 up the side of the cooker, if not, add a bit more.


 3. Set the cooker on low for 8 hours and go do some shopping or dancing or play with your puppy.


4. When the pork is looking pretty roasted, mix the coleslaw with the dressing. Add just enough dressing so the cabbage is coated, but don't drown it.


5. With a slotted spoon & a fork, transfer the pork to a large bowl, removing the bones & fat as you go. Shred the pork very thinly by pulling it apart with 2 forks. Try to break up all of the pieces so it's tender.


 6. Add a bottle of BBQ sauce, drain the slowcooker and plop the pork right back in the slowcooker for about 30 minutes.

7. Cut your buns, add the pork, some extra sauce & a big spoonful of coleslaw. Then, eat.
the final product, melt-in-your-mouth deliciousness.

I usually use just any old BBQ sauce, but this time I used PC's Pulled Pork Sauce.To be honest though, it was just okay. I think I'd rather use the Kraft stuff I used last time. For me, this sauce was too tangy and not smoky or spicy enough. Everyone else loved it though and the pork and bun were soft and tender. So I'd say if you're trying this out to just go with your favorite BBQ sauce because you'll be tasting a lot of it in this sandwich! Oh, and and trust me on this one, don't skip on the coleslaw. It brings a nice creaminess and it breaks up the strong taste of the BBQ sauce.

Do you like pulled pork? Would you try this one? Let me know your thoughts!

xo Janelle

Tuesday, July 5, 2011

Tasty Tuesdays: Pride Pockets (Healthy Pizza Pockets)

Good morning! I hope my American readers had a great long weekend.

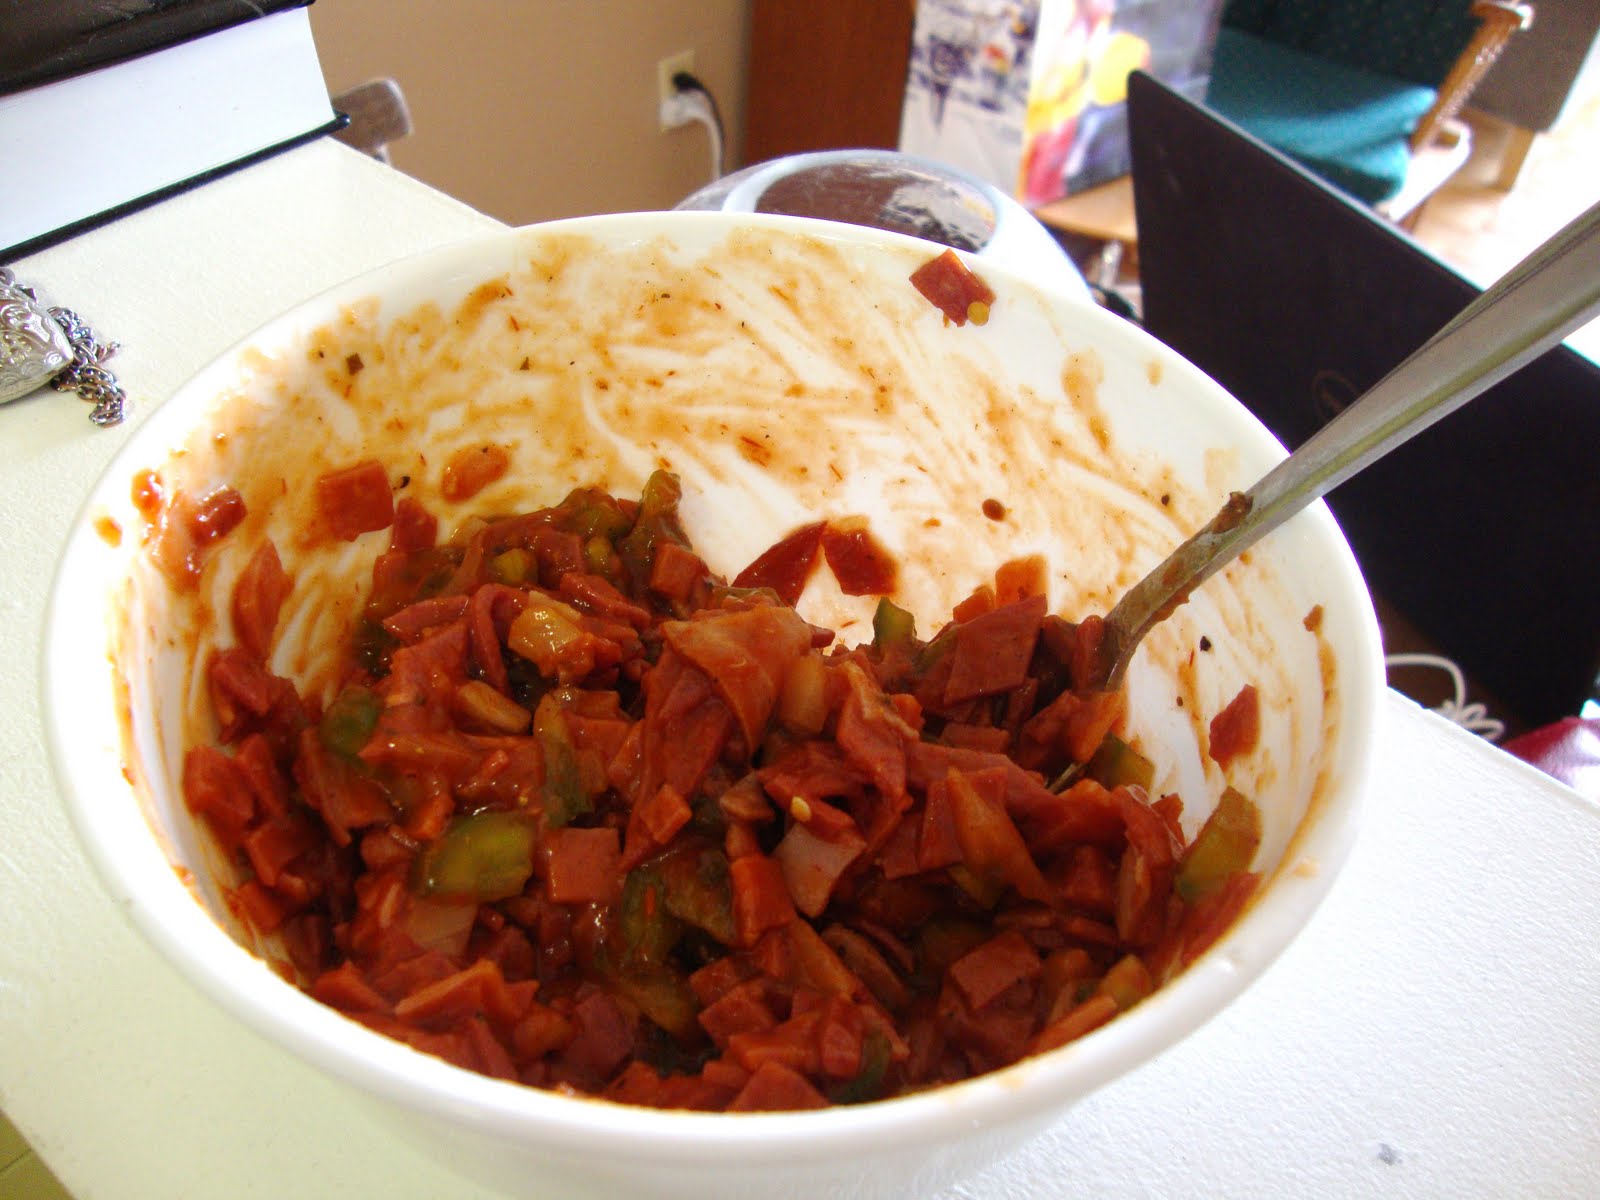
Today's recipe comes from Amuse Bouche. Whit, who writes the blog, is hilarious and if you like food blogs (which you must because you're here!) then you should check her out. You can read the recipe here, but I'll post my modified instructions here to help you out. Basically Pride Pockets are pizza pops or pockets but instead of being wrapped in god-knows-what they're surrounded by bread! They only take about 30 minutes from start to finish so they're almost as fast as making pizza pockets in the oven and the best part is you can change it up and stuff em with whatever you have on hand! Broccoli & cheddar pockets, greek pockets, meatlovers... 
Pizza Pride Pocket
Modified from Whit's Amuse Bouche
1 loaf of any kind of bread
Shredded Mozzerella
Pepperoni, salami or your meat of choice
Diced onion & green pepper (mushrooms if you like)
1 can or squeeze bottle of pizza sauce (time saver!)
Extra basil?
Salt
Pepper

1.  Preheat the oven to 350. Cut up your meat into very small pieces. Throw it in the pan and brown it with the onions, peppers, sauce, basil, salt & pepper. Add the sauce and stir until thoroughly heated.

2. While this is heating up, cut the crusts off the bread two at a time.

3. When the sauce mixture is heated, put it into a bowl and let it cool just a bit. Grate up some mozzarella and add it to the mixture. 

4. Take about a tsp-tbsp of the mixture and plop it in the centre of one piece of bread. Squish the bread down gently so it doesn't rip. Then crimp the edges of the bread with a fork to lock in the pizza stuff. Pop them in the oven for about 15 minutes, or until the tops are nice and crispy and you're done!
*The only big change to the ingredients, was that I used premade pizza sauce. I had some I wanted to use up and it ended up being faster. The only change I made to the actual instructions was to combine the sauce mixture and the cheese before putting it on the bread. Otherwise, I find it harder to keep all of the cheese contained to the middle, but feel free to do it either way.

I think this recipe is fantastic for people with kids, or for those who are kids at heart. They're healthy, nutritious and fun to make. I may have downed 2 of them and then had a little moment of realization that I had just eaten 4 slices of bread... woops. I think these would be great served with a little garden or greek salad, potato salad or pasta salad. Let me know if you give these a go! 
Almost gone...

Thanks for reading!

xo Janelle