Showing posts with label tasty tuesdays. Show all posts

Tuesday, December 6, 2011

Tasty Tuesdays: Lemon Basil Chicken


This is what I made for supper tonight! I served the chicken with some frozen sweet potato roasties + BBQ mayo. I made the chicken a few days ago so I just pulled it out of the fridge and heated it in the microwave for a fast supper.

If you'd like to give it a go, here's the "recipe":

Lemon Basil Chicken

- 2-3 chicken breasts
- 1 lemon, sliced
- a few squirts of lemon juice
- olive oil
- basil + coriander

Preheat oven to 425. Put chicken in a baking dish & drizzle with olive oil & lemon juice. Sprinkle generously with basil + coriander. Grind fresh pepper over top if you want. Place sliced lemons in dish on top or between pieces of chicken.

Bake for about 45 mins, depending on the thickness of chicken. Let sit 5 minutes to lock in juices.

I put basil on/in so many different foods: guac, eggs, wraps, salads etc and I find it pairs nicely with lemon, but if you're not a fan you can always sub chili powder, turmeric or oregano.

Bon appetit!

Tuesday, November 22, 2011

Tasty Tuesdays: Peach Oatmeal Muffins

Guess who got up to some baking on Sunday?


Now, guess how many muffins are left?

One!

Yep. The two of us destroyed eleven muffins in 3 days. Mind you, I ate 3 for breakfast on Sunday. They were pretty delicious. Chewy and soft. Not dense at all. The canned peaches left these little holes so they literally crumble in your mouth.

I also tried these new "environmentally friendly" If You Care cupcake liners from Pete's and I'm in love. The package said that they would work better than normal ones and I thought pfft, yeah right but they actually did. I will definitely buy them again. They're the same price as regular ones, but the muffins peeled off perfectly. Barely a crumb was left on them. Usually with regular liners you get a film left on the liner. Think about all the cupcake you could be eating instead of throwing away! Haha. 

I used this recipe from Dairy Goodness. Ironically, I am lactose-intolerant (what a pretentious-sounding condition) so I subbed unsweetened almond milk for the milk and low-calorie margarine for the butter. And miraculously, everything worked out perfectly. I also used canned peaches, drained as suggested and added a bit less sugar than it called for. The recipe is easy to follow, but be prepared to dirty a few bowls:


Let me know if you try them out!

Also, I've been asked recently by a few people what the difference is between a muffin and a cupcake. What do you think? I go by the general rule that if it's sweeter, it's probably a cupcake. And if there's oatmeal in it, then it's definitely a muffin. But I've had some pretty sweet muffins too... Hmm.

Anyway, thanks for stopping by the blog. I love hearing from you so don't be shy to comment!


Wednesday, November 2, 2011

Tasty "Tuesdays": Mom's Meatballs

Sorry this post is going to be a quickie. It's late and I have work in the morning! It's really not a recipe, so you won't see precise measurements... just trust me though. They're hard to screw up. Unless you burn them, so don't wander too far. No one likes a grease fire...

These taste just like the ones mom used to make for us. The soda crackers & the eggs make them so juicy. Perfect for spaghetti & meatballs.


Mom's Meatballs
Serves 4

- lean ground beef (small-med pack)
- 1 egg
- 6-8 soda crackers
- spices of your choice

Preheat oven to 400. 
Mix all ingredients with your hands in a large bowl.
Roll into bite-sized balls.
Place on a cookie sheet & bake for 20 minutes, turning once.  
Blot with a paper towel & enjoy!


yummmm.

That's it! Mix, ball, bake, eat.

Tomorrow's dinner? All done. You're welcome. ;)


Tuesday, October 11, 2011

Tasty Tuesdays: Cinnamon Poached Pears

I think I accidentally stumbled upon my favorite fall dessert recipe.

Honestly, I was never much of a pumpkin pie eater...

I based my poached pears off of this recipe. Her's are prettier, mine are healthier. Not that I was trying to make them healthy. I actually just ran out of time. I was going to wrap Pillsbury crescent roll dough around them and bake them up. Instead I stopped here:


And am I ever glad I did. They were amazing. FYI: I am not tooting my own horn here. I am not the first girl to poach a pear. And considering I can't even poach an egg.... they are simple to make. Take my word for it.

Or, you know, you could always.... make your own.

clearly a messy cook.


Cinnamon Poached Pears
modified from Sprinkle Bakes

3-5 pears (I used red)
3-4 c water
scant  1 c brown sugar
cinnamon
whole or ground cloves*
nutmeg*
2 tsp vanilla extract
crushed nuts (walnuts or pecans work well)
caramel sauce (optional)
ice-cream (optional)

Fill a pot up with 3 or 4 coups of water. Add sugar, spices and vanilla and stir well. Bring to a boil.

While waiting for water mixture to boil, peel & core pears. Add to boiling mixture. Let boil uncovered for about 20-30 minutes. Once pears are very tender, turn off burner and let pears sit in water uncovered for about 10 minutes.


Spoon pears into bowls and top with a bit of poaching liquid, caramel sauce and some crushed nuts. Top with a scoop of ice cream, if you like. Cuddle up by the fire & serve immediately.

** A note about the spices: I always eye ball my spices and add more or less to my own taste. Don't be afraid to load on the cinnamon but try to go easy on the cloves and nutmeg. A little goes a long way with those two. I learned that lesson by ruining an entire batch of pancakes with nutmeg.... Haha. **

I hope you enjoyed my little fall recipe. The sweet smell of cinnamon and vanilla wafting through the house will bring you warmth when the weather gets cold again. You may want to tuck this recipe away for safe keeping.


Tuesday, October 4, 2011

Tasty Tuesday: Tonight's Supper

Because I snacked on chocolate all afternoon at work. (Oops.) I've decided just to snack for supper. Since I had a round loaf of bread I needed to use up I made an
artichoke bread bowl dip
.


Here's what's inside:

sour cream
mayo
herb & garlic cream cheese
(all light)
1/2 can artichokes, drained/rinsed
herb & garlic dip mix
basil
grated cheddar cheese
topped with chili powder

I heated up the bowl in the oven for 5 minutes first while I warmed the dip in the microwave. Put the 2 together and done.

This is quite possibly the easiest thing to make for a potluck or when hosting a dinner. I like that it's very customizable too. Don't have artichokes? Throw in some spinach. Want a little crunch? Cut up some celery. If you don't like garlic, you could always throw in some other spices instead.

Have you ever made a bowl dip? How about a soup bowl? Tell me!

Also, FYI: I tried octopus this weekend! Eep. It was so nice of my Japanese friend to cook for us, so I simply had to try it. Luckily it was made as part of a floury dough and we added lots of yummy sauce, so I could barely taste it. It was just the texture... chewy and squeaky. Yeah...

Tuesday, September 27, 2011

Tasty Tuesdays: Black Bean Soup

Remember on Friday when I told you I made soup? Well I got the recipe for Black Bean Soup from Jen @ jenloveskev. Click for recipe. It turned out pretty good and it definitely hit the spot with some naan on a cool day. We brought some down to D's sister and she seemed to like it too! The recipe measurements are a little wonky (ml/oz etc.) but you really can't mess it up. I just used an online converter.

I made a few substitutions. I added one can of black beans and one large can of chickpeas instead of 3 small cans of black beans. I also added about a tsp more chili powder, a bit more cumin and a dash of garam masala. Yum.

Since I was too busy rushing to get everything in the pot, I only took a few pics. For the best pic of the soup, go to the jenloveskev link above! I know the one below doesn't look that appetizing... woops.

sunny yellow pot!

ingredients

after adding spices
Try this soup if you want something different that's not too outlandish. You'll like it. I promise... :)

Thanks for visiting,

xo Janelle


Monday, September 19, 2011

Sweet Potato Roasties & BBQ Mayo

 When I eat sweet potato fries I try to convince myself that they're healthy. I mean, they are vegetables. Not that I feel guilty about eating food. I really don't. But, I try to follow the Canada Food Guide as much as I can so I guess it's more like me squeezing in an extra serving of veggies. Moving on, last week I had a few sweet potatoes to use up and because I definitely do not have the patience to cut them into perfect fry shapes... I made roasties aka. hashbrowns. Much less time consuming and just as delicious.


It would be pointless for me to type up a recipe for these. Really all you need to do is cut up the potatoes, toss with some olive oil, salt, pepper and chili powder. Roast em in the oven for a bit and then broil them.

Now, if you're going to try one thing from my blog... trust me, try this BBQ mayo. I whipped this up sometime last year trying to recreate the cajun mayo restaurants serve with their SP fries. Ketchup is just not the same. This sauce is tangy, sweet and can be spicy if you ramp up the chili powder. It works well with fish, steak, sandwiches, regular fries and chicken too. I've started making a little extra so I can have some for leftovers. Oh, I bet it would be awesome on hamburgers too. Someone should try that and let me know how it is... Haha.

So listen, it only takes 1 minute to make and I guarantee you have everything you need to make it in your fridge/cupboard right now. Mayo, BBQ sauce & chili powder. That's it. Mix half mayo, half BBQ sauce and sprinkle in some chili powder. Done. (Almost) instant sauce.

she doesn't photograph well...

Enjoy & indulge,
Janelle

Tuesday, September 13, 2011

Tasty Tuesdays: Baked Zucchini Bites

Ok so this "recipe" is like Jalapeno Poppers, but without the Jalapenos. These tasty zucchini bites require very little prep-work and few ingredients. They were inspired by the baked zucchini sticks in the latest Kraft What's Cooking, but I had no ShakeN'Bake so I had to improvise.


Baked Zucchini Bites
*Serves 2-4 people

You'll need:
2 zucchini
1 egg
fine breadcrumbs (I used store-bought)
chili powder
basil
ground pepper
ranch dressing, for dipping

1. To roast the breadcrumbs, preheat oven to 400 and bake crumbs on a baking sheet until dark brown. Let cool.


2. Mix breadcrumbs, basil, pepper & chili powder on a plate. In a small separate bowl, whisk egg and a splash of water.

3. Wash and slice up your zucchini into bite-sized pieces. Pat dry with paper towel and sprinkle lightly with salt.


4. Dip the zucchini into the egg mixture and then roll in the breadcrumb mixture. Place in a greased glass pan.

Online tip for breading: Try to keep one hand "wet" and one "dry". So, dip the zucchini with your right hand, put it on the plate of crumbs and then use your left hand to throw the crumbs on top of it. Then roll it around with your left hand until covered. This makes such a difference, trust me!


5. Bake at 400 for about 20-30 minutes or until slightly crispy. Serve immediately with ranch dressing. Enjoy!

These make for a delicious treat that tastes bad for you but isn't. Great for picky eaters and over-indulgers. Bring on the vegetables!
These don't keep well and are soggy when reheated so eat them up right away.


Love,
Janelle

Tuesday, September 6, 2011

Tasty Tuesdays: Chocolate Cherry Cupcakes

Good morning everyone!  I have a fun recipe to share with you today. On Friday D & I whipped up some cupcakes to take to his parents' place for the weekend. We were going to make these, but we didn't want to wait for the dough to rise aka we're impatient, so we went with these Chocolate Cherry Cupcakes from EatingWell (click for recipe). We also had a bunch of cherries that were past their prime, so this was a great way to use them up before we left.

Side Note: Don't you just hate wasting food? I had to throw out a $2 avocado last week and figured I may as well just throw in a toonie. We're trying to be more mindful of how much goes to waste just because we don't feel like eating it or we forget about it. As a bonus, I get to try new recipes!

Okay, back to this recipe.

We made a few substitutions to the original.
- Subbed unsweetened applesauce for the oil.
- Subbed all-purpose whole wheat & all purpose white for the cake flours.
- Subbed soy milk with 2 tsp for the buttermilk & added about an extra 1/3 cup.

And.... they still turned out great. The cherry flavour is really subtle, but then you'll get a bite of a juicy piece of cherry. And, thanks to our handy applesauce substitution, they're not that bad for you. Have a peek at how delicious they look:


So, I'm planning on making a big batch of these the next time cherries are on sale. And not sharing....

Kidding.


Love & cupcakes,
Janelle


Tuesday, August 16, 2011

Tasty Tuesdays: Irresistibly Fudgy Brownies

 
Do you remember when I told you Sundays put me in a baking mood? Well this past Sunday was no exception. The boy & I decided to whip up some brownies using a recipe he had taken from what he thinks was his mother's old church cookbook. Why are they irresistible? Because I eat four yesterday & four Sunday and there are currently 2 left. Woops? Wanna know how you too can eat a half pan of brownies? Check it out:

Irresistibly Fudgy Brownies
Taken from an unnamed family cookbook
*Serves 10 people with self-control. Otherwise, serves 2.

Preheat your oven to 350.


Mix dry ingredients:

1 1/3 c. flour
1 tsp baking powder
1/2 tsp salt
1c cocoa

Look at those big, strong arms!

Mix wet ingredients:
4 eggs
1c. melted butter
2 c. white sugar
1 1/2 tsp vanilla

Combine the wet with the dry, pour into a greased 9x13" pan. Bake for 30-35 minutes or until a toothpick comes out nearly clean.

Now I don't know why I started doing this, but I think this is how my mom used to serve brownies... with applesauce! The tartness of the apples cuts the sweetness a bit and makes it a taste explosion in your mouth! Haha.

YUM  

But if you're more into the frosting (like D is) here is the matched frosting.

Mix 3 tbsp melted butter, 1/4 c. cocoa, 1/4 c. milk, 1/2 tsp vanilla & 2 c. sifted icing sugar. Frost only once brownies are cooled.
These brownies are absolutely perfect. The top crisps up and crackles like it should and the middle is soft and chewy. If chocolate fudge and chocolate cake had a baby, it would be these brownies. No joke. They're easy to make and you probably already have everything you need to make them. So unless you're on a diet or your gluten free or some shit, you should do them up. I promise it'll be worth it. Do it for your tastebuds, not for your ass hips.

xo Janelle

Tuesday, July 26, 2011

Tasty Tuesdays: How have you bean?

Hi everyone,

Today I've got an original (aka. thrown-together) recipe for 3-bean salad with feta. It can easily be ready in 10 minutes and it goes really well with fish, chicken or rice. Because of the cumin & coriander it's different than most bean salads which rely on vinegar. This one has no vinegar but gets it's flavour from the feta and spices. Check it out:

3-Bean Salad with Feta
*Serves 3-4

1/2 c. edamame
1/2 c. green beans
1/2 cup chick peas, drained
1/4 c. raisins
1/8 c. crumbled feta cheese
1/8 tsp cinnamon
1/4 tsp cumin
2 tsp olive oil
a couple shakes of ground coriander
pinch salt

Put your raisins in a small bowl and cover with hot tap water. Cook up your frozen edamame & green beans in the microwave. I put mine in a covered, microwave dish and nuke them for about 2-3 minutes. Drain them, put them back in the dish & add the chick peas.

Add the olive oil, spices + salt. Crumble the feta on top & mix well. Drain the raisins and throw them in. Stir it up and bam. You're done.

------------

I added some extra cumin to mine, but I think I may love it more than the average person so feel free to experiment a bit! And trust me, don't skip out on soaking your raisins. It makes such a difference because they plump right up.

xo Janelle

PS- I ate it too fast to get any pictures... but I think you can figure it out!

Tuesday, July 12, 2011

Tasty Tuesdays: Slow-Cooker Pulled Pork

Good morning! Hope your morning is off to a good start. I didn't have a good sleep, but I'm in bed eating some of my favorite oatmeal so I'm pretty happy at the moment. If you read yesterday's post then you know we made pulled pork for supper on Saturday. We were having my Nan, Grandad, Auntie Judy and cousins Hannah & Philip over. I made a double batch (Hello leftovers!) but the recipe that follows is a single one.

Now if you read this blog at all, you know that I love simple recipes and this one is just that. You pop the pork in the slow cooker and go about your day for the next 8 hours or so. Then it takes about another 15 minutes of work to get it all ready. For this reason, it's great to make when you're having guests because no one likes to spend the whole time in the kitchen and miss out on the fun, right? Anyway, here is the "recipe":

Slow-Cooker Pulled Pork

Serves at least 4

1/2 large onion, diced
1 pork roast, shoulder or butt
1-3 c. apple juice
1 bottle of BBQ sauce
1 bag of coleslaw (or cabbage very thinly sliced)
coleslaw salad dressing
4+ buns, Kaisers are good
salt & pepper


1. Put your onions in the bottom of the cooker and trim the fat off of your roast.


2. Put your roast in the cooker, pour the apple juice over the top and season the roast with salt & pepper. The apple juice should be about 1/3 up the side of the cooker, if not, add a bit more.


 3. Set the cooker on low for 8 hours and go do some shopping or dancing or play with your puppy.


4. When the pork is looking pretty roasted, mix the coleslaw with the dressing. Add just enough dressing so the cabbage is coated, but don't drown it.


5. With a slotted spoon & a fork, transfer the pork to a large bowl, removing the bones & fat as you go. Shred the pork very thinly by pulling it apart with 2 forks. Try to break up all of the pieces so it's tender.


 6. Add a bottle of BBQ sauce, drain the slowcooker and plop the pork right back in the slowcooker for about 30 minutes.

7. Cut your buns, add the pork, some extra sauce & a big spoonful of coleslaw. Then, eat.
the final product, melt-in-your-mouth deliciousness.

I usually use just any old BBQ sauce, but this time I used PC's Pulled Pork Sauce.To be honest though, it was just okay. I think I'd rather use the Kraft stuff I used last time. For me, this sauce was too tangy and not smoky or spicy enough. Everyone else loved it though and the pork and bun were soft and tender. So I'd say if you're trying this out to just go with your favorite BBQ sauce because you'll be tasting a lot of it in this sandwich! Oh, and and trust me on this one, don't skip on the coleslaw. It brings a nice creaminess and it breaks up the strong taste of the BBQ sauce.

Do you like pulled pork? Would you try this one? Let me know your thoughts!

xo Janelle

Tuesday, July 5, 2011

Tasty Tuesdays: Pride Pockets (Healthy Pizza Pockets)

Good morning! I hope my American readers had a great long weekend.

Today's recipe comes from Amuse Bouche. Whit, who writes the blog, is hilarious and if you like food blogs (which you must because you're here!) then you should check her out. You can read the recipe here, but I'll post my modified instructions here to help you out. Basically Pride Pockets are pizza pops or pockets but instead of being wrapped in god-knows-what they're surrounded by bread! They only take about 30 minutes from start to finish so they're almost as fast as making pizza pockets in the oven and the best part is you can change it up and stuff em with whatever you have on hand! Broccoli & cheddar pockets, greek pockets, meatlovers... 
Pizza Pride Pocket
Modified from Whit's Amuse Bouche
1 loaf of any kind of bread
Shredded Mozzerella
Pepperoni, salami or your meat of choice
Diced onion & green pepper (mushrooms if you like)
1 can or squeeze bottle of pizza sauce (time saver!)
Extra basil?
Salt
Pepper

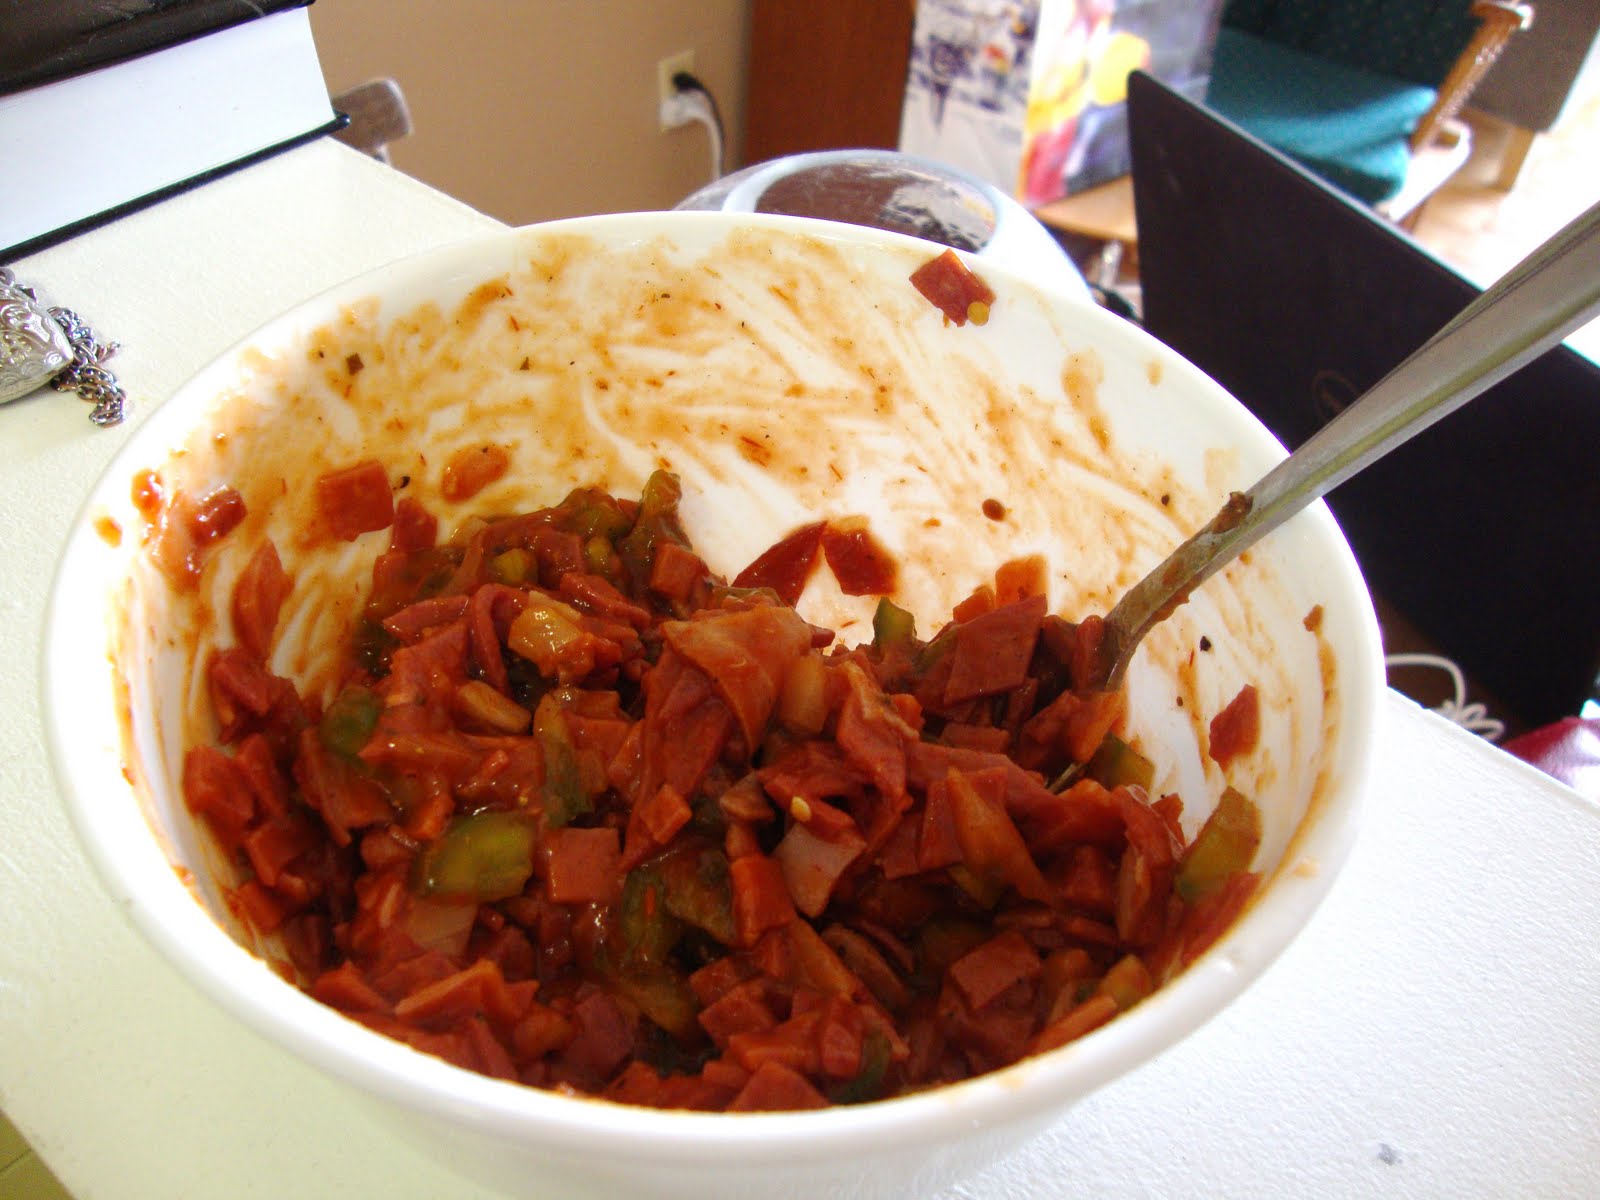
1.  Preheat the oven to 350. Cut up your meat into very small pieces. Throw it in the pan and brown it with the onions, peppers, sauce, basil, salt & pepper. Add the sauce and stir until thoroughly heated.

2. While this is heating up, cut the crusts off the bread two at a time.

3. When the sauce mixture is heated, put it into a bowl and let it cool just a bit. Grate up some mozzarella and add it to the mixture. 

4. Take about a tsp-tbsp of the mixture and plop it in the centre of one piece of bread. Squish the bread down gently so it doesn't rip. Then crimp the edges of the bread with a fork to lock in the pizza stuff. Pop them in the oven for about 15 minutes, or until the tops are nice and crispy and you're done!
*The only big change to the ingredients, was that I used premade pizza sauce. I had some I wanted to use up and it ended up being faster. The only change I made to the actual instructions was to combine the sauce mixture and the cheese before putting it on the bread. Otherwise, I find it harder to keep all of the cheese contained to the middle, but feel free to do it either way.

I think this recipe is fantastic for people with kids, or for those who are kids at heart. They're healthy, nutritious and fun to make. I may have downed 2 of them and then had a little moment of realization that I had just eaten 4 slices of bread... woops. I think these would be great served with a little garden or greek salad, potato salad or pasta salad. Let me know if you give these a go! 
Almost gone...

Thanks for reading!

xo Janelle