Showing posts with label home. Show all posts

Monday, January 20, 2014

currently | a positive start to 2014

I have so much to tell you and show you - including a trip to Mexico - but I don't want to force the words out. Here's a look at what's been up lately around here.


watching & listening | to lots of youtube videos.

That includes listening to every Jhene Aiko song I can find - this one in particular. Her voice is so unique and soothing. Her style is hard to peg, but it's half R&B and half chill.

reading | On Looking.

A friend of mine (hi, SE!) recommended this to me about a year ago I'd say and only now am I getting around to it. I've only read a few pages so far, so I can't give you a real review. Based on what I've read so far though, I think it will help me be more present, especially on my walks with Abby.


Sometimes I drag her along in the mornings because I woke up late. I hope to be able to get out of bed earlier and take our walks on a slower pace. I'm sure she would appreciate the extra time to sniff our neighbours' compost bins and find errant turkey bones.


annoyed by
| our front door's lock.


With the rain and cold we've had lately, our lock has frozen. It takes me a good minute or so of wiggling and tapping in order to get the key in. Let me just say right here that tapping is putting it lightly. More like slamming? This cannot be done bare-handed - mittens are a must. Otherwise, I would cut myself. So, yesterday I was a bit too ambitious (aggressive?) with my "tapping" and broke D's key in the lock.

neglecting | cleaning my bathroom.

It's really not that bad. Ever since the new year, D & I have been on an organizing/cleaning kick. Straight up, I am a messy person. That said, in the past few weeks I've made a few changes in my habits that have made a huge impact. Now... dishes only sit on the counter for a day or two and I keep a few surfaces free of clutter. The keyword here is few - my dining/craft table always seems to house those things that don't have a "home". Tell me you have a space that seems to collect the most random things...?


We've also reorganized our spare room closet, our tupperware cupboard and two bookshelves. I wish I had pics to show you because this is a major improvement.

So with all of that, my bathroom has taken a back seat.

excited about | buying a house.

I think 2014 is going to be the year. Want to follow along?

Follow on Bloglovin

Thanks so much for reading,
xx Janelle

Sunday, September 8, 2013

weekend recap | getting stuff done at home


veggies from D's dad | abby waiting patiently for her treat | hedgehog closeup | blurry selfie, since i rarely post my face on here.

This weekend was just what I needed. I think D and I were both craving some time at home to do some cleaning, watch movies and relax.

On Friday night we watched FIBA Americas (basketball). Then on Saturday, I had a laughing fit with the seniors at our dance fitness class. The theme was ABBA and we came up with some pretty creative choreography. "Jump with my baby", turned into us miming being pregnant while hopping up and down. Almost everyone was in stitches. Maybe you had to be there?

Saturday night we watched The Beach - I know. I can't believe it took me this long to watch it. Apparently, it's a classic Leo movie. I liked it, but I feel like it started going downhill about halfway through. The whole gameboy scene was a bit wacky.

Today we got a few things done around the house that we've been procrastinating on. Hung a curtain in the living room (pics soon!), cleaned 3 windows, and hung up this painting I did a while ago.


I try not to see the mistakes when I look at it. I do like the hair though and it's the first of my artwork I've ever framed and hung. Plus I think it coordinates well with the wall colour.

What did you do this weekend? Fill me in.


Thanks for stopping in,
xx Janelle

Thursday, May 23, 2013

goodbye gray : a painted makeover - a paintover?

One project on my list last weekend was to add some colour to the craft room/office. There is a flat-weave, beige patterned rug in there and the walls are a very light gray, aptly named Chelsea Fog. You may have seen it in my post on photo ledges. I actually really love the gray in that space. I find that having a neutral colour on the walls helps keep my mind clear to create. 

That said, a room full of neutrals can feel a bit flat - particularly if it's been overcast and drizzly for the past, oh say, ten days.

Although I wasn't quite ready to paint any of our hand-me-down, solid wood furniture just yet, I knew I could easily tackle the concrete (plaster?) planter. It was a Winners find sometime last winter for around $20. And it would give me an excuse to browse the paint chip aisle.

Here's what it looked like before:


See how it kind of blends in to the wall behind it? It looks better in this pic than it does in person.

I was contemplating either a dark teal, sunny yellow or a kelly or emerald green. After I got the nod of approval from D, guess which one I picked... Keep quiet if you saw my sneak peek yesterday ;)

Emerald. Specifically, Eleanor's Emerald by CIL.

Here is how the project went down:
  
Prepping

- I put my hot painting clothes on, grabbed a 2" angled brush, a butter knife (to pop the can) and some newspaper/cardboard.

- I laid down newspaper and then cardboard to protect the floor. The cardboard was easy to peel away from the painted surface, but a drop cloth or plastic tarp would work well too.

- I taped around the inside of the rim with painter's tape for a clean line on the inside. Since the tree is a swirly bugger and actually rests on the rim in one spot, I decided to tape him up too just to be safe. If you squint, you can see this in the bottom right photo below.


Painting

- To get even coverage, I did three thin coats of paint working my way around. In hindsight, I probably should have used primer first but since this tree will stay inside (at least for now) it'll be fine. If you plan to house yours outdoors, I would recommend priming, and also using a sealant afterwards. Gotta protect it from the elements.

- I peeled off the tape after painting & slid the planter back in its place.

PS: I listened to Design*Sponge answer FAQs about their blog while I painted. Grace & Amy were so lively to listen to - a welcomed distraction!

After

I have to admit when I decided on green I was a bit nervous about it being too much green with the leaves and all, but I intentionally chose a green that was more blue since I knew the plant had yellow undertones. This gives it a bit more contrast than if the planter was a lime-y colour.

Here's how it turned out:


I'm so happy with it. Every time I walk into the room my eye goes right to that corner. Thankfully, it helps distract from the fact that there is a Star Wars poster hanging above it. I know how to pick my battles when it comes to decorating...

It's surprising how painting an accessory can have a big impact. And now that it's done - I've been thinking about what else I could do to tie the room together. Next on the docket:


- Hang curtain rod & panel on the window
- Fix the lack of closet door situation
- Re-organize bookshelf
- Get diploma from home & hang it up


Are you an emerald fan? 

If you did any decor projects recently, feel free to link up in the comments, I'd love to see!

xx Janelle

Wednesday, May 22, 2013

small apartment : show me the green


I painted something this past weekend. And wouldn't you know it's in Pantone's Color of the Year for 2013 --- Emerald.

I'll spill the details soon. My brain is just feeling a bit foggy from so much computer time at work and in the evenings. Time to switch off for the night.

Any guesses on what has been given a new life with this splashy green?

See you soon (I promise!),
xx Janelle

Monday, April 1, 2013

brighten up a small apartment bathroom with $10

Apartments have the weirdest bathrooms. Especially, old houses converted into flats. Although our last apartment was in a tower, it still had it's fair share of design flaws. There was a grate in the ceiling (apparently for venting) but the bathroom had no fan or window and therefore, no airflow. As you can imagine, we had major mould issues. After a particularly hot shower, the condensation would actually drip down the walls leaving little slug lines. It was gross.

Guys, our new apartment has a fan. It's so luxurious! Oddly enough, it also has a window in the shower and a half-wall made of those see-through blocks, which I think are from the eighties. Do you know what ones I mean? The door is a sliding barn door, which I admit would be pretty cool, if it didn't leave a four inch gap on one side and had a working lock.

There's a point to all this, I promise! Keep reading...


The fact that I'm pointing out all of my bathroom quirks might make you think I don't like it, but I do! I really do. Despite the fact that it's tiny, there is a ton of storage and it has the perfect little nook for our plastic storage drawers which hold towels and toiletries and ten thousand bottles of shampoo. A wall-mounted sink also means no countertop clutter, since everything is hidden away in the mirrored cabinet. If I'm given a counter, I will clutter it, so this is a blessing. Thank you, apartment bathroom gods. 

Onto the upgrade! All you have to do for this one is shop. Zero handiwork and/or tools needed. 


Along with all of their weird features, apartment bathrooms can be a little blah. Our current beige bathroom desperately needed a little colour, so I bought a purple orchid, put it in a handmade clay dish and set it on the toilet tank. It's amazing how much of a difference it made. The blooms really pop against the white fixtures and shower curtain. This one was only ten bucks (!!) at Superstore, but I know they have them at Sobeys too.


I swear these flowers were made for people who can't keep a plant alive. I have somehow managed to kill every plant or flower given to me, so I can say this with certainty! This pretty lady is still kicking one month later. Not only is it still alive, but it's actually thriving. New blooms just keep popping up. I've also taken to excitedly announcing each new bloom to D. He's somewhat less enthusiastic about it than I am.


How to NOT kill a mini orchid: Stick it by a sunny window. Water it once a week with a tablespoon of cold water.

Never though I'd be dishing out plant advice, but here I am. One mini purple orchid makes a dingy apartment bathroom seem a bit brighter!  


Spring is here!
xx Janelle


PS - I'm sorry this post has my toilet in it. Just focus on the flower!
PPS - I have a long-awaited series of green cleaning posts coming up very soon. Made specially for lazygirls, like me!

Tuesday, February 26, 2013

wall art for cheap : photo shelves


Art doesn't have to be fancy or expensive to have an impact. It took me 6 months to realize this.

I had been waiting months to hang up an art print I bought shortly after moving into this apartment last August. We don't have a Target up here in Halifax and Wal-Mart has the worst selection of modern frames. I wanted a thin, white wood frame with a mat. I couldn't find one, so I tacked it to the wall, still in it's plastic sleeve. It looked a bit sad.

Sometime last fall I was browsing the dollar store and spotted these shallow white ledges. I think they're called postcard ledges or photo shelves or something like that. Anyway, a few years ago I lusted over similar DIY shelves on YoungHouseLove and thought the art print might look nice perched on one. As I stood in the aisle, trying to think of a reason to buy a few more, I remembered some treasured travel photos I had fished out of my parents' old photo boxes. The shelves were only $2 each so I got three and practically skipped home to show D my finds.

After months of stalling contemplating the perfect spot, I finally decided on the space above my craft table - which you finally get to see! I was originally going to hang all three of them in evenly spaced parallel lines, but then I saw Rachel Howe's home tour on DesignSponge.

Photo by Chris Fantauzzi for DesignSponge

And just like that, I was sold on an asymmetrical arrangement. I leveled the shelves and hung them using the provided tacks. No nails needed! I lined these two shelves with a few photos, one tiny art print and a postcard that says Be, which was a sweet gift from a close friend (hi, Lo!).


Here is a closeup of the hand-lettered piece you see tacked up with washi tape. I made it a little while ago. Sometimes I can spend all day planning or dreaming up creative projects. This reminds me to actually make stuff, to create something. The photo on the right was taken by my parents. My wanderlust always comes bubbling to the surface when I look at it. Here's hoping I will be able to travel soon.


The stuff you see hanging on the left a few photos above is a mish mash of family photos, an ink & acrylic piece that says "create freely", a dotted wave greeting card and a sketch I did of D one night. Here's a better look.


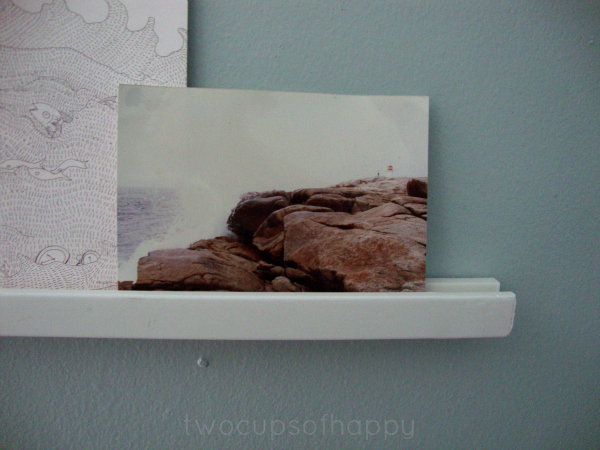
The last shelf found a home on my side of the bed with two coastal inspired pieces. The print is by Sarah Burwash and was found at the ever-inspiring local boutique, Inkwell. The photo is of Peggy's Cove, Nova Scotia with it's iconic lighthouse playing "Where's Waldo" in the background.


That pic shows how shallow the shelves actually are. A really thin frame might fit.


These are usually the first things I see in the morning, which makes me so happy. I dream of waking up in a lakehouse someday, but until then I'll enjoy my makeshift water view, however small it is.

So there's my little weekend apartment beautification project. $6 shelves + homemade art, photos & prints = wall art for people with student loans. Can I get an amen? If you're in Canada and want to find the shelves, hit up the Dollorama. I'm sure you can find them in other stores too or you can make your own if you have a few basic tools like YHL did in the link above.

Okay, so I'm sure I can't be the only one who takes forever to slap some art on my walls. When you move to a new place, do you hang everything right away or stall until you can find the perfect art, frame or arrangement?

xx Janelle 

Monday, February 4, 2013

a cozy home : 6 styles of plank flooring


via Style-Files, featured in Bolig

If there was one word you wish people would use to describe your home what would it be? 

My choice would be cozy.

On Pinterest, I'm bombarded with white-washed rooms with dog-hair-free floors and organized, coordinating sets of dishes. My apartment has (mostly) "renter beige" walls. My cupboards house a slew of mismatched mugs, each with a story to tell and the faded, salt-tinged paw prints leading from the entryway hint of a long leisurely walk on the snow-covered sidewalks of our neighborhood. I'm working toward accepting my lived-in home for what it's worth. The truth is, I've struggled to appreciate our current place.

Last fall, my parents stayed a few nights in our apartment while D & I were out of town. When I caught up with them to see how their stay went, my mom said that our place was so cozy. In that moment, no other word could have been a bigger compliment. When people visit, I want them to feel at home. I don't want them to worry about their kids breaking anything or be too shy to put their feet up on our coffee table chair that acts as an ottoman. Having a cozy home, for me, creates a relaxed atmosphere and welcomes people in. There are many ways to make a home cozy, but today I want to focus on flooring.

One interior design feature that never fails to conjure up warm, fuzzy feelings - at least for me - are plank floors. We used to have them in my parent's basement, but they have now been replaced with laminate. Our current apartment also has a garish tiger-stripe laminate. When we can finally afford a house, I'll be keeping an eye out for little touches that welcome a comfortable decor. And let me tell you, the first thing to go will be the hypothetical carpets!

I found some pretty rooms that showcase different styles of plank flooring that I'd like to share. I can't even choose a favorite because they are all so beautiful.

PAINTED


via Sconahem

--

UNTREATED


What a cute pooch!

via DesignSponge, photos by Marc Andrews (Studio306)

--

AGED


 via TraditionalProductGalleries, flooring by AppalachianWoods

--

TEXTURED


via Revival Flooring

-- 

WHITE-WASHED


via HomeDsgn, architecture/design by Element
 
Do you have a favorite?

How would you want others to describe your home - in one word?

xx Janelle

Wednesday, January 2, 2013

a Christmas surprise


This is what happened when I surprised by parents by coming home a day early. They were expecting me home on the train in the evening on Dec 21st.

Backstory:
So that night we cleaned the kitchen and dining room and the plan was for me to hide in the spare room and then come out and say "what's for supper"? Instead, what happened was Mom and Dad were so surprised by the house being clean, that they thought something was up. E & M (my siblings) could not stop smiling. So this lead my Mom to ask where all of the clutter was and for my Dad to suggest that they had put it in the spare room. Here comes my Dad sauntering into the room to find me crouching in the dark in the corner. Instead of screaming or laughing, he starts clapping and tells Mom that they did put all the stuff on the bed. Mom's reaction is the best! When my mom is excited or happy she just laughs. It's the cutest thing.

Hope you're all having a great weekend.

Sunday, November 11, 2012

details : from a cozy home in the country

I'm in the country. Today is Remembrance Day and tomorrow is a holiday so we packed up and came to the Musqodoboit Valley for the long weekend. So far we've trudged through the swampy yard (thank goodness my "MIL"reminded me to bring rubber boots!), raked some leaves, watched a raptors game and ate chili.

Here are some details from around their home.


We'll be off soon to visit D's sister. His niece and nephew are so excited to see us that we are heading over around noon instead of supper-time as we originally planned. I've heard I've been promised to his niece to play Just Dance on the Wii. Should be interesting!

I hope you are all having a relaxing weekend. I'm off to let my whiny pup run around in the field.


I've noticed lately that designing or decorating a home is all about the details. More than that though, life is all about the details - the moments. Over the next few months I'm going to test out a series called details. Since I don't have instagram or a smartphone to capture my daily life, I'm going to rely on my trust Sony P&S and will share the photos here. I hope you like it!

Saturday, July 16, 2011

simple storage using ish you already have.

I hope you're having a great weekend. We are in "Sunday-mode" today and are just relaxing, cuddling the puppy & napping.

For this weeks home post, I put together some easy, don't-even-have-to-think-about-it storage ideas. Baskets and bins are always, always a safe bet but sometimes it's fun to think outside of the box (so punny!). I wanted to share these ideas because they use things you probably already have kicking around, which means more cash for you (or for weekend booze) and means you're creating less waste (which will make you part of the "green/eco-conscious/environmentally friendly" club). Honestly though, they look pretty and do the job. And who doesn't love stuff that's cheap, pretty and functional?

Try storing your toothbrushes in a fun mug, instead of a holder or cup.

I have mine in this green Alexander Keith's mug, which goes with the haphazard tree/nature theme we've got going on. A mug with a pedestal bottom would look elegant, whereas a short round mug in a punchy tangerine or teal would bring some energy and color.

Use a pretty gift-bag on your dresser to hold clutter (headbands, perfume bottles, lotions, receipts etc.).
I had a teeny empty version of this Coach gift bag on my dresser and decided to clear some stuff off my dresser by throwing it in. The bag is up high enough that the junk doesn't show and I can always go back and put everything away later. Yay for procrastination!

Source   

Store bathroom essentials in old berry containers or tangerine crates.
I love this storage idea from Real Simple! If you're like my mom and you hoard hotel shampoos and soaps, this is a great way to keep them all together. You could also grab a few travel-sized toiletries, tuck in a rolled facecloth and an extra toothbrush and leave it out for guests. Or tie a ribbon around it to fancy it up and give it as a sweet little hostess gift.

Real Simple

Keep utensils within reach in these charming pots.
These would work perfectly for parties, weddings, potlucks etc. and would make good office or kitchen storage too! How about using one as a napkin holder on the dining room table?

Simple Home Life via Pinterest

Use mason jars to store craft supplies, makeup, q-tips and things.
Confession: I am obsessed with mason jars. We used to use them as cups when we were kids so naturally they make me very nostalgic. I have so many DIY projects to do with these... everything from candle holders to painting them from the inside to making vacation jars. If you Google mason jar uses you'll see why I'm so inspired! Check out the idea below using hose clamps and what looks like molding. Cute, eh?

Source

I hope you enjoyed my tips. Don't forget that these can all be used wherever you need to control your clutter. If you always have pens and notes scattered by the phone, set a painted jar there to hold them. If you always drop your keys and phone when you come in the door, set a vintage butter-dish there to keep them out of sight. I get overexcited when I find something that looks nice and actually works well for me. Boxes, baskets and bins are fine for some things, but I need a little bit of personality, a little bit of "cute". This post actually has me excited about cleaning and organizing... never knew that was possible. I'll be sure to post whatever I end up doing. Keep an eye out next week for a heart shaped DIY project I'm working on....

Do you have any ideas for recycled storage? What do you think of these ones? Do you hate organizing, but love being organized? Let me know!

xo Janelle

Friday, May 20, 2011

Casa Fridays: Reclaimed Wood Tables

Happy long weekend everyone! Hope you get to spend some time relaxing. So, it's not a secret that I'm into interior design and decor (HGTV is always on), but because I live in an apartment there are limits to what I can do. For example, I'm not going to go out and buy a new bed/dresser set because it's expensive and I don't want the hassle of selling it in a year for less than what it's worth. Makes sense, right?

Now I may not be able to buy big-ticket items, but a girl can dream. And dream I do. I probably spend an unhealthy amount of time thinking about how my future home will be, what style of furnishings I want, paint colors, backyard ideas... etc. etc. etc. A lot of this daydreaming will never amount to anything. Would I like an old claw-foot tub in a spacious bathroom with floor to ceiling windows? Um, yes. But will it ever happen? Ha.

But I bet you've guessed (by the title of this post) that the one thing I absolutely will have one day: a reclaimed wood dining table. Or at least one that looks like it was reclaimed. There's something about them that captures my full attention, all the knots, the dents, the imperfections. They remind me of a cottage or a camp table and they're just so comfortable looking. These tables look like someone enjoyed them before you did because, well, someone did (unless you DIY). Plus, you can feel good about reusing wood that otherwise would be rotting in a landfill somewhere... Reused, comfortable, pretty and you don't need to worry about every little nick, dent and scratch.

There are a few ways to go about getting one of these babies:
1. You can either buy the reclaimed wood and make your own. Most cities/towns have a place you can go to get wood that's in decent shape. Hardware stores would know where the closest one is...

2. Buy one, either in-store or hand-made. Check Kijiji for some authentic, handmade ones. They're generally less pricey than store-bought ones.

Photo credit: The Globe and Mail

3. Or you can take the ambitious route and buy wood, make it look reclaimed and make a table yourself. Young House Love has an easy-to-follow tutorial. On a side note, if you like home-related things check out their blog. It's about renovating/decorating their old bungalow project by project. Oh, and they're pretty hilarious.
Photo credit: John & Sherry of younghouselove.com

 Here are some other ones I like:

 
Just an old door with glass on top. Genius!


I would put bright colored chairs with this one.

Love this pretty blue one.
I hope you're daydreaming now too... Thanks for reading!

xo Janelle